There are many things that can be considered when deciding whether to create and implement a photinia hedge or not. You will find that the decision to go with the hedge is often based on other home design choices. Such as your backyard size, the landscape surrounding your home, as well as how much time you want to spend on maintaining the hedge.
A lot of homeowners prefer using a photinia hedge because they require very little maintenance. If you need more tips, keep reading.
What is a photinia hedge?
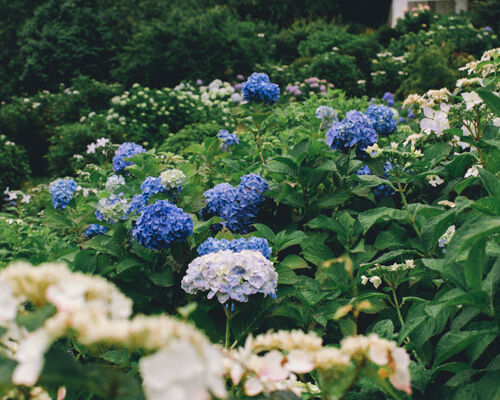
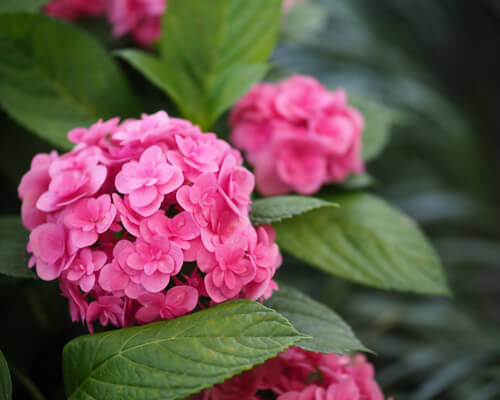
The photinia hedge is a type of shrub that’s categorized in the Hydrangea family. It’s well known for its ability to grow to an impressive height and width, making it the perfect choice for a privacy fence.
Though this plant is native to Japan, it has taken off in popularity in the US because of its durability, beautiful foliage, and long blooming period.
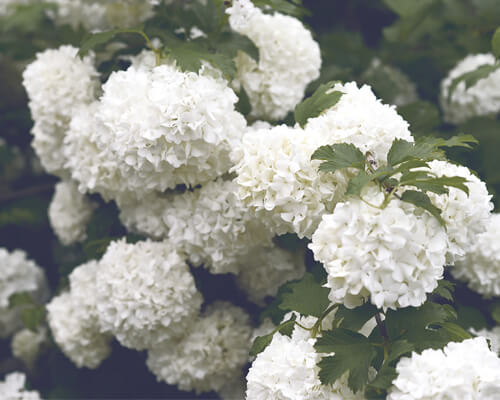
It produces white flowers that bloom from May through September. It provides flowers for up to two months at a time and also produces berries that remain on the shrub until late autumn.
Berries are small, spherical, and can be red or black depending on the species.
This plant is very easy to maintain and doesn’t require much care. It does well in most climates and soils as long as it gets enough sunlight throughout the day.
When planting your photinia hedge, you should have 3-4 plants per linear foot of fence space. This will ensure that your hedge stays thick and doesn’t grow too skinny or lanky in any one area.
While your shrubs are flowering – which they do year-round – you can expect to receive lots of compliments on them. Most people who aren’t familiar with the plant assume that they’re rose bushes when they first see this plant.
Best time to trim photinia hedge
It’s generally recommended to trim photinia hedges in late winter to mid-spring. This is when the plants are actively growing and putting on new growth. So it makes sense that they’ll be at their healthiest and most resilient during this time.
At the same time, you may notice that prolonged exposure to direct sunlight can dry out your hedge, which could make it more difficult to maintain and keep healthy.
By trimming it outside of summer, you’ll have a few months break from the sun’s rays without risking any significant damage to the plant.
If trimming in spring or early summer, you may find that certain areas begin to look overgrown. Because they’re not as exposed to sunlight as they would be in summer.
The majority of your hedge will still look as good as ever, though. And you can use some basic shearing techniques to even out the appearance.
Once your hedge has reached its desired height, you can also work with your local landscaper or garden center to schedule regular cleanups during these seasons.
By doing so, you’ll be able to take care of most of your hedge maintenance during times when the plant is already growing at its peak rate. But if something goes wrong or if you need help reaching a particular target.
How to thicken photinia hedge?
A great way to thicken a hedge is to use a method called “layering.” To do this, you cut off an amount of new growth from the bottom of the hedge.
Then you cut that branch into several smaller branches and plant them in the ground beside the mother hedge. The new branches should be about 20 inches long and at least 1/4 inch thick at their base.
I like to use garden twine to tie around the new branches as I plant them, just below where they emerge from the soil.
This ensures that they stay in place until they are strong enough to stand on their own. If you leave them untied, the wind could blow them around and displace them before they have a chance to root properly.
1 year later, remove any of these new branches that have died, and dig up any that are not rooted adequately at their base.
You can also remove any new branches that grow too large for your liking (such as overhanging your house), since they will already be established by this point.
Then simply repeat the process, so that you end up with several layers of densely packed shrubs around your original tree or small bush.
How to care for photinia hedge?
The photinia hedge is a wonderful and unique addition to your garden. It’s very easy to take care of and maintain. The most important thing you can do is keep it healthy and vibrant by watering, fertilizing, and pruning it.
Caring for the hedge begins with watering. Water the hedges once or twice a week during the summer, and once a week during the winter.
It needs to be watered thoroughly, so use a sprinkler or hose attachment that delivers a lot of water. Watering can be done in the morning or evening.
For feeding, try using a hedge fertilizer that contains nitrogen, phosphorous, potassium and magnesium. Apply two pounds per 100 square feet of hedges in early spring and again in mid-summer.
When it comes to cutting your hedge, don’t do it too often or too little. You need to give your hedge some room to grow. But if you let it get too tall before trimming, you’re inviting damage from high winds and disease.
The best rule of thumb is to cut off one-third of the length each year.
This amount will vary depending on how fast your specific variety grows. Be sure to trim your hedges on a dry day so they don’t wilt before they have a chance to recover.
Photinia hedge common diseases
As a homeowner, you naturally want to keep your plants and trees looking their best. But when something gets in the way of that, you may end up taking more drastic measures.
Today we’ll be discussing a couple of common diseases that can affect your Photinia hedge, as well as what you can do to treat them.
Bacterial leaf spot disease
Bacterial leaf spot is caused by the Xanthomonas campestris bacteria, which travel on water droplets to infect new leaves.
The leaves develop yellow spots which gradually turn brown and leathery. The infection can spread quickly and may also cause branches to die back.
This disease is most commonly treated with copper sprays or injections. Chemical treatments are available from garden centers and hardware stores.
Try using a copper spray on your hedge during the late summer or early fall. Doing this to help prevent the bacterial leaf spot from becoming established in your hedge.
Also prune off any infected branches and dispose of them to avoid spreading the disease to other plants in your yard.
Bacterial spotting is another form of bacterial infection. It affects Photinia hedges as Xanthomonas campestris does, but it is caused by a different bacteria.
Canker
Canker generally occurs on the stem, but occasionally it may also occur on the leaves and buds. It appears as a sunken area on stems, which may be surrounded by soft brown or blackish discoloration of bark.
The tissue inside the canker may eventually die and become covered with a layer of corky tissue or callus.
Whenever a plant has canker, there is always some source of stress that is causing it. And the plant needs to be examined for other possible problems such as insect infestation or mineral deficiency, or both.
A proper diagnosis and treatment should be done by your local nursery professional if you want to save your plants from this disease.
Botrytis blight
Botrytis blight on the photinia hedge is a fungal invasion that causes brown and black patches on the leaves.
The problem is caused by a variety of factors, including excessive moisture, poor air circulation, excessive shade or dense growth.
The Botrytis blight begins as small brown spots on the leaves which then turn black as the disease spreads to other parts of the plant.
Sometimes these spots will coalesce and form large dead areas on the leaves which will eventually drop off with the weather getting colder. In really bad cases, whole branches may be lost to this disease.
The best way to avoid the spread of this problem is to plant your photinia hedge. So that there is good air circulation around it, preferably full sun for at least part of the day.
Proper watering and fertilization will also help make sure your plant grows strong and healthy.
Prune out any branches that have already died from this disease, if possible while they’re still green (before they dry out). If you notice any new spots appearing on your plants, cut them off as well.
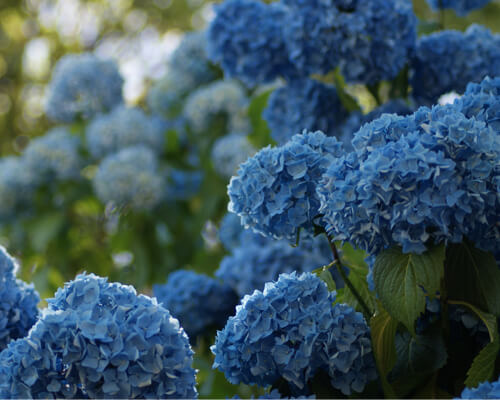
Photinia hedge height and spacing
The key to spacing when planting Photinia is to consider whether you want the shrubs to grow close together or spaced apart.
If you want them to fill in some space, then you shoul plante them much closer together. The size of your hedge will depend on the variety of the shrub. So it is important to select a plant with a mature size that fits your needs.
Some varieties of Photinia can grow as high as 10 feet tall, while others are much smaller and will only reach about 4 feet tall.
If you have a specific size in mind for your hedge, plant the shrubs about 3 feet apart from each other.
This is a typical spacing for most hedges, but do not make them any closer together than this or they will begin to grow sideways instead of up.
Leave at least 5 feet between the shrub rows so that you can easily access the interior when you need to work with the plants.
This will also allow enough room for maintenance equipment and ensure that you have enough room for pruning and shaping each year.
Post spacing, give your plants plenty of water at the first planting. And continue to provide water regularly during the first year and during droughts in subsequent years.
Conclusion
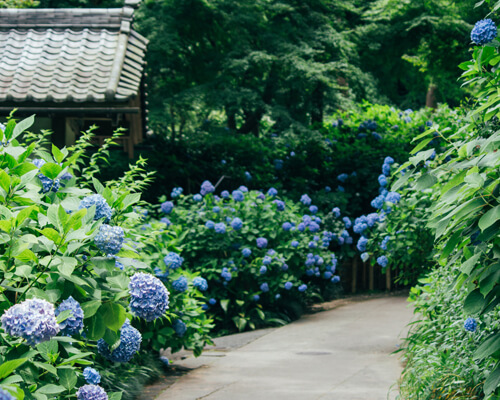
The Photinia hedge is one of the most rapidly growing hedges ever developed. People often use it as a privacy hedge or decorative hedge depending upon its location.
As a privacy hedge it can be planted next to a tennis court, deck or pool as an added measure of security. The bush appears compact but actually branches out like a shrub. And this characteristic distinguishes it from any other shrubs.
These bushes blend well in residential settings around your home as well as commercial areas such as inside the shopping mall.
The shinning foliage provides excellent shade. Thus the plant should not be planted in the exposed spot of your garden or yard. Because the constant change in temperature will affect the plants’ growth adversely.